Imagine waking up on a chilly morning, only to step into a lukewarm shower. The culprit? A water heater plagued by sediment buildup. Regularly flushing your water heater is crucial for ensuring you always have hot water when you need it. Ignoring this maintenance task can lead to clogs, reduced efficiency, and costly repairs.

What makes an effective flushing method? A reliable tool that simplifies the process, along with clear instructions and safety precautions. The right equipment can make a significant difference in both ease of use and effectiveness, allowing you to restore your water heater’s performance without hassle.
This article explores the best tools for flushing a water heater, including a detailed review of the Sediment Buster® Water Heater Flushing Tool. You’ll find insights on maintenance, environmental considerations, and step-by-step instructions to keep your water heater running smoothly.
Here’s a quick comparison of key specifications for flushing tools.
| Features | Sediment Buster Tool |
|---|---|
| Material & Build | Durable, heat-resistant |
| Key Specification | UL Verified V699054 |
| Main Feature | Removes sediment clogs |
| Performance | Improves hot water pressure |
| Best Use Case | Homeowners with sediment issues |
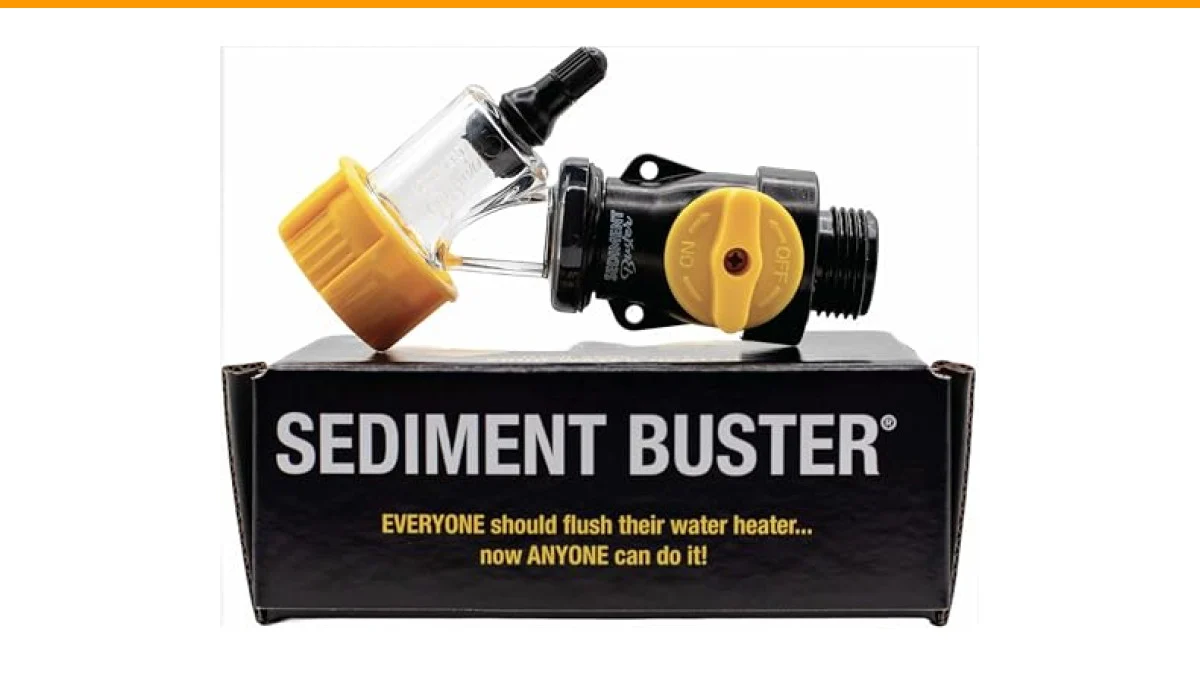
The Original Sediment Buster® Tool
The Sediment Buster® Water Heater Flushing Tool is designed for homeowners facing sediment buildup in their water heaters. It’s ideal for those who have hard water or live in areas with high mineral content, as these factors contribute to sediment accumulation. This tool is especially beneficial for DIY enthusiasts looking to perform regular maintenance without hiring a plumber.
What sets this tool apart is its UL Verified status, ensuring it’s safe to use under high temperatures and pressures. The tool utilizes compressed gas cartridges or an air compressor, which effectively breaks up sediment clogs. Many users appreciate the instructional videos that come with the product, making it straightforward to use even for those new to home maintenance.
However, while the tool is effective, it does require a separate purchase of a gas cartridge or air compressor. If you don’t already have these on hand, you’ll need to factor in the additional cost and effort to acquire them. Additionally, some users may find the flushing process messy if not done carefully.
- UL Verified for heat & pressure
- Compatible with compressed gas cartridges
- Comprehensive instructions provided
- Improves hot water clarity
- Designed for effective sediment removal
Best for: Homeowners with sediment issues looking to perform DIY maintenance.
Importance of Regular Water Heater Maintenance
Regular maintenance of your water heater is essential for its longevity and efficiency. Sediment buildup can lead to a range of issues, including reduced hot water output, inefficient energy usage, and even complete system failure. Flushing the heater at least once a year helps prolong its lifespan and ensures you consistently receive hot water.
Without routine maintenance, you may experience a significant decrease in water quality. This results in cloudy water and unpleasant odors, which could indicate a more serious problem. Addressing these issues early can save you from costly repairs or premature replacement of your water heater.
Tools and Supplies Needed for Flushing
To flush a water heater effectively, you’ll need several essential tools and supplies. These include:
- Garden hose: For draining the water
- Bucket: To catch any overflow
- Plumbing wrench: For loosening connections
- Compressed gas cartridge or air compressor: For the flushing tool
- Safety goggles and gloves: To protect yourself during the process
Having these items readily available will streamline the flushing process and ensure you can tackle any unexpected issues that arise.
Step-by-Step Guide to Flushing a Water Heater
Safety Precautions Before You Start
Before you begin flushing your water heater, it’s vital to take necessary safety precautions. These include:
- Turning off the power or gas supply to the heater
- Shutting off the cold water supply
- Ensuring you wear safety goggles and gloves
- Having a bucket or drainage area ready to collect water
These steps prevent accidents and ensure a safer working environment.
Turning Off Power/Gas and Water Supply
Start by turning off the power supply for electric water heaters at the circuit breaker. For gas heaters, set the thermostat to the “pilot” position. Next, shut off the cold water supply to the tank to prevent additional water from entering while you’re flushing it.
Draining the Water Heater
Attach a garden hose to the drain valve at the bottom of the water heater. Place the other end of the hose in a bucket or drain. Open the drain valve and allow the water to flow out until the tank is empty. This process can take some time, depending on the size of your water heater.
Flushing Process for Clear Water
Once the tank is empty, it’s time to flush out any sediment. Use the Sediment Buster® Tool as per the instructions provided. This typically involves connecting it to a compressed gas source and directing it into the drain valve. Allow the tool to run for several minutes, and you should see clear water flowing out.
Restoring Power and Checking System
After flushing, close the drain valve and disconnect the garden hose. Turn the cold water supply back on, allowing the tank to fill. Once filled, restore power or gas to the heater. Check for any leaks around the connections and ensure the heater is functioning correctly.
Signs Your Water Heater Needs Flushing
Recognizing the signs your water heater needs flushing can help prevent more severe issues. Watch for:
- Cloudy or discolored hot water
- Unusual odors from the water
- Decreased hot water pressure
- Strange noises from the tank
If you notice any of these signs, it’s time to flush your water heater.
How Often Should You Flush Your Water Heater?
Experts recommend flushing your water heater at least once a year. However, if you live in an area with hard water, you may need to flush it more frequently, perhaps every six months. Regular flushing helps maintain efficiency and prolongs the lifespan of your water heater.
Environmental Considerations and Water Conservation Tips
Flushing your water heater not only improves performance but can also be an opportunity for water conservation. Use the water collected during the flushing process for outdoor irrigation or other non-potable uses. This approach reduces waste while keeping your garden hydrated.
Additionally, consider the environmental impact of your water heater. Tankless water heaters can be a more energy-efficient option, reducing your carbon footprint. If you’re in the market for a new system, weigh the benefits of tankless options against traditional models.
Troubleshooting Common Flushing Issues
Sometimes, flushing a water heater can present challenges. Common issues include:
- Inadequate water flow during flushing
- Difficulty opening the drain valve
- Persistent odors or discoloration after flushing
For inadequate flow, check for clogs in the drain valve. If the valve won’t open, you may need to use a plumbing wrench to loosen it. If problems persist, consult a professional to avoid damaging your water heater.
Final Tips for Maintaining Your Water Heater
In addition to flushing, consider other maintenance tasks such as checking the anode rod every few years and inspecting for leaks. Keeping a maintenance schedule can help you catch issues before they require costly repairs.
Frequently Asked Questions (FAQs)
How do I know if my water heater needs flushing? Look for signs such as cloudy water, strange odors, or decreased pressure.
Can flushing my water heater save energy? Yes, it can improve efficiency, leading to lower energy bills.
Is it safe to flush my water heater myself? Yes, if you follow safety precautions and instructions carefully.
How long does it take to flush a water heater? The entire process typically takes about 1-2 hours, depending on the tank size.


