You walk into the basement one morning, and there’s water pooling around the heater. Or maybe the hot water runs out halfway through your shower. Most homeowners don’t think about their water heater until something breaks. By then, you’re looking at a repair bill or a full replacement. A little preventive work every year can save that headache.
This article lays out a realistic maintenance schedule for Bradford White gas water heaters. You’ll get specific steps, timeframes, and the reasoning behind each task. No fluff, no guesswork. By the end, you’ll know exactly what to do — and when to do it.
Bradford White
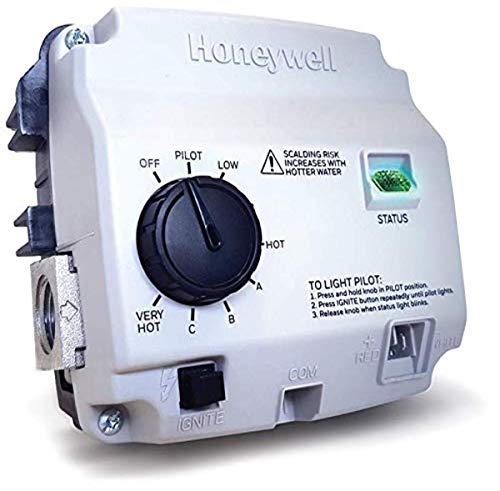
Bradford White Natural Gas Control Valve Water Heater 1" Icon 2.0 OEM Universal Replacement Residential System 415-52907-01 4155290701 Replaces Icon 1.0 2394746301 239-47463-01
- 1 Inch Gas Line Universal replacement service kits available to replace previous ICON valves, Advanced control system for accurate…
- Millivolt-powered control requires no external electicity
- Pilot-on indication, simple 1,2,3 lighting instructions
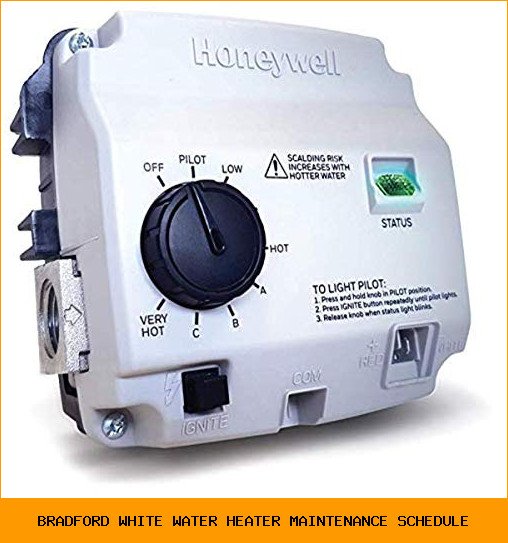
If your heater uses the ICON control system (common on many Bradford White models), a common failure point is the gas control valve. Replacing it with a genuine OEM part like the Bradford White Natural Gas Control Valve 1′ ICON 2.0 (ASIN B07RCCPJK2) can restore proper operation without calling a plumber. It’s a direct swap for older ICON 1.0 valves, includes an integrated piezo igniter, and runs on millivolt power — no external electricity needed. Keep that in your back pocket if your control valve ever acts up.
Why a maintenance schedule matters
A water heater runs silently for years, so it’s easy to ignore. But sediment builds up. Sacrificial anodes corrode. Temperature and pressure relief valves can stick. Without regular attention, these small issues turn into expensive failures.
Bradford White builds solid tanks, but they still need care. A typical gas model lasts 10-12 years with good maintenance. Without it, you might get 6-8 years. That’s a difference of thousands of dollars in early replacement costs.
The schedule below assumes you have a standard gas-fired tank model. If you have a heat pump or electric unit, some steps change (no combustion chamber inspection, for example).
The annual checklist: once a year, same time every year
Pick a date — maybe when you change smoke alarm batteries. Do everything below at the same time.
1. Drain and flush the tank
Sediment (mostly calcium and magnesium) settles at the bottom. It insulates the water from the burner, making the heater work harder. In severe cases, it can create rumbling or popping sounds during heating.
- Turn off the gas supply.
- Attach a garden hose to the drain valve at the bottom.
- Run the hose to a floor drain or outside.
- Open the drain valve. Let water run until it’s clear.
- Open the pressure relief valve briefly to let air in and speed draining.
Do this once a year. If you have hard water (over 10 grains per gallon), do it every 6 months.
2. Test the temperature-pressure relief valve (T&P)
This is a safety valve. It opens if pressure or temperature inside the tank gets too high. A stuck valve can cause an explosion.
Lift the lever on the valve for a few seconds. You should hear a gush of water and see it stop when you release. If it drips continuously or doesn’t open, replace it. Bradford White T&P valves are inexpensive and easy to swap.
3. Inspect the anode rod
The anode rod is a sacrificial metal rod that attracts corrosion so the tank doesn’t rust. Once it’s eaten away, the tank starts rusting.
Remove the hex head on top of the heater (usually 1-1/16 inch socket). If the rod is less than 1/2 inch thick or shows exposed steel wire, replace it. Expect to replace the rod every 3-5 years depending on water chemistry.
4. Check the burner assembly and flue
For gas heaters, the burner and the flue (the pipe inside the tank) can accumulate dust or soot. A dirty burner causes yellow flames instead of blue, which wastes gas and creates carbon monoxide.
Remove the outer access panel. Look at the burner flame through the window. It should be mostly blue with a small yellow tip. If it’s lazy or orange, clean the burner ports with compressed air or a small brush. Also check the flue baffle for debris.
The 5-year check: what to do before things go wrong
Every five years, step up your maintenance. By this point, the anode rod is likely shot. The gas control valve may show signs of fatigue. Tanks that have never been flushed are at high risk for sediment buildup.
Replace the anode rod if you haven’t already. Consider replacing the T&P valve as preventive measure. And if your water heater is approaching 10 years, it may be more cost-effective to start budgeting for a new unit than to keep repairing.
For homeowners who want peace of mind, the ICON 2.0 control valve (B07RCCPJK2) is a common upgrade if your original ICON 1.0 fails. It includes intelligent diagnostics that flash error codes, making troubleshooting much easier than older models.
What about the control valve? When to replace it
Bradford White’s ICON control valves are reliable, but they do fail. Common symptoms: pilot won’t stay lit, no ignition, or flashing error codes. If you see error codes like 3 or 4 flashes (depending on model), the valve may need replacement.
Replacing the whole valve is a DIY job if you have basic plumbing skills. The gas supply has to be shut off, and you’ll need pipe dope rated for natural gas. The ICON 2.0 replaces the older ICON 1.0 without any wiring changes — it’s a millivolt system, so no batteries or electric hookups. Just swap the valve, reconnect the thermocouple and pilot tube, and relight the pilot.
Here’s a quick comparison of signs that tell you which route to take:
| Symptom | Likely Cause | Action |
|---|---|---|
| Pilot won’t stay lit | Faulty thermocouple or control valve | Test thermocouple; replace valve if needed |
| No hot water, no pilot | Gas control valve failure | Replace with ICON 2.0 |
| Rumbling or popping | Heavy sediment | Flush tank; consider full drain if severe |
| Water smells like rotten eggs | Bacteria in tank (often from anode) | Replace anode rod with aluminum/zinc type |
| T&P valve leaking | Thermal expansion or bad valve | Check expansion tank; replace T&P if needed |
That table covers most common issues. If you get a persistent error code on the ICON display (a blinking LED), consult the manual. Codes are listed inside the door panel.
Frequently asked questions
How often should I flush my Bradford White water heater?
Once a year is the official recommendation. If your water is hard (over 7 grains per gallon), flush every 6 months. You’ll know it’s time if you hear rumbling — that’s steam bubbles trapped under sediment.
Can I replace the gas control valve myself?
Yes, if you’re comfortable with gas connections. Shut off the gas at the valve, unthread the old unit, apply pipe dope to the new one, and tighten. The ICON 2.0 is designed as a direct replacement. If you smell gas after installation, close the valve and call a professional.
What does the blinking red light on my Bradford White control valve mean?
Different blink patterns indicate different errors. One flash: pilot flame not sensed. Two flashes: thermopile voltage low. Three flashes: control valve failure. Four flashes: high temperature cutoff. Consult your manual for exact codes.
How long does a Bradford White water heater last?
With proper maintenance, 10 to 12 years. Without it, 6 to 8 years. The tank itself is glass-lined steel, but the anode rod determines if the tank rusts through. Replace the anode every 3-5 years to maximize lifespan.
Is it worth replacing a control valve on a 10-year-old heater?
That depends. If the tank is leaking or the burner is badly corroded, replace the whole unit. If the tank is sound and the valve is the only issue, a $150 valve replacement beats a $1,500 water heater. Check for rust around the drain valve or bottom of the tank first.
What to do next: your action plan
You don’t need to be a plumber to keep your heater running. Most steps take less than an hour. Here is a short list of what to do right now:
- Pick a date for annual maintenance — tie it to something you do every year, like daylight saving time.
- Buy a garden hose that reaches a drain. Make sure it fits the drain valve.
- Order a replacement anode rod and a 1-1/16 inch socket. They’re cheap.
- Test the T&P valve this weekend. If it sticks, replace it.
- If your control valve ever fails, keep the ICON 2.0 (B07RCCPJK2) in mind for a drop-in fix.
- Flush the tank now if you haven’t in the past year. Even if it’s been two years, it’s not too late — just expect more sediment.
- Write down the date you do each task. A simple notebook or a note on your phone works.
A water heater doesn’t ask for much. Give it that little bit, and it’ll keep giving you hot showers for years.


