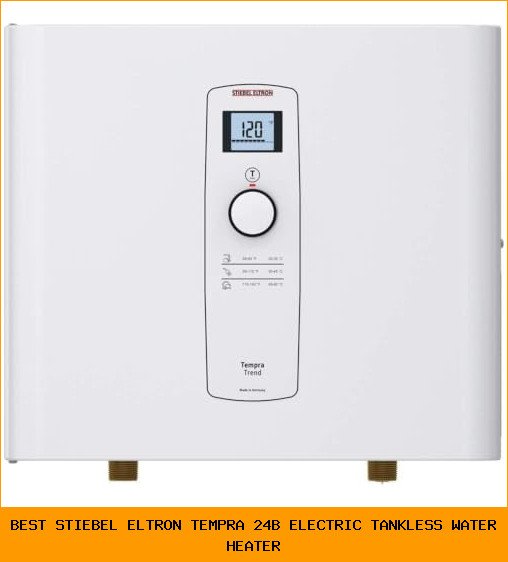
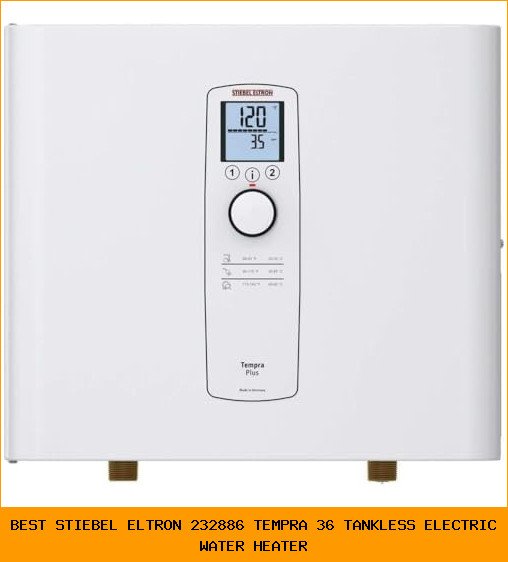
You come home after a weekend away in January. The house smells like damp plaster. There’s a puddle under the water heater, and the wall behind it is swollen. A pipe froze overnight, split, and let water run inside your wall for hours. That repair cost me $1,400 last year. I don’t want you to make the same mistake.
Winterizing your water heater isn’t a one-size-fits-all job. It depends on whether your unit lives in a heated basement, an uninsulated crawlspace, or outside. It also depends on whether it’s a tank or tankless model. By the time you finish this article, you’ll know exactly which steps apply to your setup. You’ll know the water temperatures that trigger freezing, the tools you need, and the one thing most people forget until it’s too late.

I’ve winterized water heaters for fifteen years, both in my own house and for clients. I’ve made every mistake there is. This guide collects the lessons that actually matter, and skips the filler.
If your winter prep covers more than just the water heater, the book Get Ready for Winter: How to Winterize Your Mobile Home walks through the full property checklist. It’s written for mobile homes, but the principles apply to any house with exposed plumbing. I keep a copy in my truck for reference.

Why Your Water Heater Freezes and How That Ruins It
Water expands when it freezes. A gallon of water becomes about 1.1 gallons of ice. Inside a water heater tank or a pipe, that expansion has nowhere to go. Something gives — usually a seam, a valve seat, or a pipe joint.
Most water heater tanks crack when the water inside drops below 32°F for more than six hours. But the real trouble starts earlier. Pipes connected to the heater can freeze at 20°F if they’re in an unheated space with no insulation. Once a pipe blocks with ice, pressure builds on the hot side. The tank’s temperature-pressure relief valve might pop, or a copper line splits at the fitting.
Tankless water heaters have an even shorter freeze window. Their heat exchangers hold very little water, but that water freezes fast — often in under an hour at 15°F with wind. Once the exchanger cracks, the whole unit is scrap. There’s no repair; you replace it.
The takeaway: water doesn’t have to turn solid inside the tank to cause damage. Ice forming in the incoming or outgoing lines is enough to wreck your system.
Step-by-Step: Winterizing a Tank Water Heater
These steps apply to gas and electric tank heaters located in a cold space or being left unused for winter. If your heater stays inside your heated living area, you only need step 5.
1. Turn Off Power or Gas
For electric units: switch the breaker off. For gas: turn the thermostat to ‘pilot’ or ‘off’ and close the gas valve. Marking the breaker with tape keeps someone from accidentally flipping it on.
2. Close the Cold-Water Inlet Valve
The inlet valve is usually on the cold line entering the top of the tank. Turn it clockwise until it stops.
3. Attach a Garden Hose to the Drain Valve
The drain valve sits at the bottom. Connect a hose and run it to a floor drain, sump pump pit, or outside (if temps are above freezing). Open the valve. If it’s clogged with sediment, use a screwdriver to poke through the opening. I’ve seen valves that wouldn’t drain because of a single pebble.
4. Open a Hot-Water Faucet
Go to the highest faucet in the house — second floor bathroom works best. Turn the hot side on. This lets air into the system so the tank drains faster. Water will trickle for a while, then stop.
5. Remove the Drain Valve or Leave It Open
For full winterization, unscrew the drain valve completely. That’s the part most guides skip. A plastic valve left open can still trap a thumb-sized puddle that freezes and cracks the tank’s bottom. If you can’t remove it, leave the valve fully open and tilt the tank slightly toward the drain side with a shim.
6. Pour RV Antifreeze into the Lines (Optional but Smart)
If the house will be empty for weeks, pour 1-2 gallons of non-toxic RV antifreeze into the hot-water lines. Open each faucet until pink liquid appears. Don’t use automotive antifreeze — it’s poisonous.
Winterizing a Tankless Water Heater: Faster, but Less Forgiving
Tankless heaters freeze differently. Their heat exchangers have narrow passages that ice can block in minutes. Most modern units include freeze-protection sensors that run the pump and heater when internal temps hit 37°F. That works only if power stays on. If the power goes out for more than two hours at subfreezing temps, your heat exchanger is at risk.
To winterize a tankless unit manually:
- Turn off the gas and electricity at the disconnect switch.
- Close the isolation valves on the cold and hot lines.
- Open all hot-water faucets in the house to relieve pressure.
- Connect a hose to the service drain ports (usually two valves on the unit’s front).
- Open the drain valves and let every drop run out. Shake the unit gently to dislodge trapped water.
- Disconnect the inlet and outlet lines if possible. Tilt the heater forward a few degrees to drain the internal cavity.
- Pour one quart of RV antifreeze into the inlet port if the unit will sit unused. Crank the heater slightly to let it reach the exchanger.
One detail people miss: tankless heaters often have a plastic condensate trap inside. That small cup holds water. It freezes and cracks, which leaks into the electronics. Remove the trap and dry it separately.
If you live in a region where power outages are common, consider a hard-wired backup. The battery backup on most units only lasts about four hours. Not enough for a multi-day freeze.
Insulation and Heat Tape: When and How to Use Them
Insulation slows heat loss but doesn’t add heat. If your water heater sits in an area that stays below 35°F for more than a day, insulation alone won’t prevent freezing. You need heat tape or a space heater.
For pipes: use self-regulating heat tape rated for outdoor use. Wrap it spirally around the pipe with the thermostat sensor touching the pipe. Never overlap the tape — that creates hot spots that can melt the insulation or start a fire. Follow the manufacturer’s max length. Most tape is rated for 30-foot runs.
For the water heater tank itself: a fiberglass blanket (R-11 or higher) helps in unconditioned spaces. Leave the top uncovered if it’s an electric unit (the wiring needs airflow). For gas units, keep the blanket away from the burner access panel by at least 6 inches.
I once worked on a mobile home where the owner wrapped the tank so tightly the plastic liner melted against the flue pipe. That’s a fire hazard. Leave the blanket loose enough to slide a finger between it and the tank.
| Setup Type | Freeze Risk Level | Key Winterization Step | Tools Needed | Time Estimate |
|---|---|---|---|---|
| Tank (indoor, heated) | Low | Insulate pipes, set thermostat above 55°F | Pipe insulation foam | 30 min |
| Tank (indoor, unheated) | Medium | Drain tank, remove drain valve, add antifreeze | Garden hose, RV antifreeze, screwdriver | 1.5 hours |
| Tank (outdoor) | High | Drain completely, disconnect lines, store in shed if possible | Wrench, hose, heat tape | 2 hours |
| Tankless (indoor, heated) | Low | Leave power on, check freeze protection | None (visual check) | 10 min |
| Tankless (outdoor or garage) | Very High | Manual drain, remove condensate trap, add antifreeze | Hose, bucket, RV antifreeze, socket set | 45 min |
One more thing about outdoor tankless units: some manufacturers void the warranty if the unit is installed in a location that reaches 0°F without a heated recirculation loop installed. Check your manual before assuming freeze protection sensors suffice.
Pre-Winter Maintenance That Saves Your Heater
Winterization isn’t just about the freeze. Sediment and old parts make the freeze damage worse. Three things to do before the first hard frost.
Flush the Tank
Drain a gallon of water from the tank’s bottom until it runs clear. If the water comes out brown or gritty, you have heavy sediment. That debris holds moisture against the tank floor. When the tank tries to heat, the sediment insulates the metal and causes overheating — which makes the gas valve cycle aggressively. In winter, that constant cycling can crack the flue liner. Flush until the water runs clean. For tankless units, run vinegar through the descaling connection every 12 months.
Test the T&P Valve
The temperature-pressure relief valve is a brass fitting on the top or side of the tank. Lift its lever briefly with a bucket underneath. You should hear a gush of water and a hiss of steam. If nothing comes out, the valve is seized. Replace it. A frozen valve means pressure can’t release — the tank becomes a bomb. I replace mine every two years. They cost less than $20.
Check the Anode Rod
That magnesium or aluminum rod inside the tank sacrifices itself to prevent corrosion. If it’s down to less than 1/2 inch thick, winter stress will eat the tank’s steel. Replace it now, not after a leak. Anodes cost $30 and take 20 minutes with a socket wrench and a breaker bar.
Frequently Asked Questions
Do I need to drain my water heater if I’m leaving for winter?
Only if the tank sits in an area that drops below freezing while you’re gone. If your house will stay at 55°F or higher, leave the tank full but turn the thermostat to ‘vacation’ mode. Draining an unused tank in a heated house actually lets air in and speeds up internal corrosion. The real danger is pipes in uninsulated walls. Focus on those instead.
What temperature should I keep my home to prevent freezing?
Set the thermostat to 55°F minimum. Below that, interior wall cavities can drop into the high 30s even if the air in the room is warmer. If your water heater is inside that space, keep the room at 60°F for a buffer. The temperature drop at the floor level can be 5-8 degrees colder than the thermostat reading.
Can I use RV antifreeze in my water heater?
Yes, but only non-toxic propylene glycol RV antifreeze. Never use ethanol or methanol types — they damage rubber seals and are toxic. Pour it into the water lines after draining, not into the tank itself. If you’re storing the house for the season, you can also put a gallon directly into the empty tank through the hot water outlet. Close the drain valve first.
How do I winterize a tankless water heater that’s installed outdoors?
Follow the manual drain procedure I described above. Then disconnect the inlet and outlet pipes at the unit. Leave the valves open. Remove the condensate trap and dry it. Cover the unit with a waterproof, breathable tarp, but leave the bottom open for ventilation. If your local code allows, install a 120-volt heat cable wrapped around the unit — some models have a dedicated terminal for it. Check the manufacturer’s compatibility first.
Why does my water heater make noise after winter?
Most likely sediment that settled during the idle months. When the water froze and thawed, it loosened scale deposits at the bottom. Those bits now rattle when water heats. Another possibility: an air pocket formed in the tank during draining and never fully purged. Turn off the power, open a hot faucet, and let the tank refill for 10 minutes. If the noise persists, flush the tank. If it’s a popping sound, that’s mineral scale on the heating element — replace it.
The short version: your winter prep checklist
- Know your unit type and location. A tank heater in a heated basement needs almost nothing. An outdoor tankless needs full manual drain.
- Drain the tank completely if it won’t be used in cold temps. Remove the plastic drain valve. Airflow beats trapped water.
- Use RV antifreeze in the water lines, not automotive coolant. One or two gallons covers most houses.
- Wrap exposed pipes with heat tape, not just foam. Foam delays freezing; heat tape prevents it.
- Test the T&P valve before winter. Replace a seized one.
- Keep the room temperature above 55°F at all times. Use a temperature alarm on your phone if you travel.
- Read the book Get Ready for Winter: How to Winterize Your Mobile Home if you need a complete property checklist. It covers pipes, skirting, and furnace step-by-step.