You walk into the laundry room, twist the hot water tap, and get nothing but a thin, sad trickle of cold water. The water heater sits there like a silent metal monument, and you realize the pilot light has gone out again. It happens. Drafts, a faulty thermocouple, or even a quick gas pressure hiccup can snuff it out. The good news is that relighting it is a straightforward job you can handle yourself in about ten minutes, provided you follow the right sequence and respect the safety rules.
This guide covers the exact process for lighting the pilot on a Rheem Professional gas water heater, what to check when it won’t stay lit, and the honest differences between the older standing pilot models and the newer electronic ignition systems. I’ll also explain why some fixes are DIY-friendly and which ones genuinely require a licensed plumber or gas fitter. By the end, you’ll know exactly what to do and what not to do.
Rheem
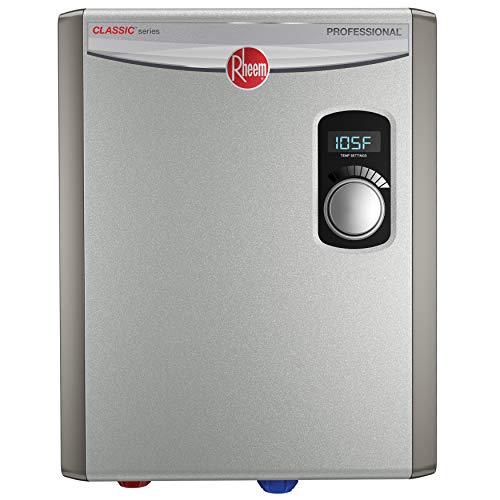
Rheem 18kW 240V Tankless Electric Water Heater, Gray
- External digital thermostatic control with LED display (+/1 degree accuracy)
- Most advanced self-modulation, adjust power to meet hot water demand
- Durable Copper immersion two heating elements, field Serviceable. Flow Rate- up to 4.4 GPM
If you’re in the market for a new unit and gas isn’t your thing, the Rheem 18kW 240V Tankless Electric Water Heater (ASIN B01MR7Z39V) is a solid alternative. It uses copper immersion heating elements and a digital thermostatic control with LED readout, so there’s no pilot to light at all. We’ll get back to that later, but first, let’s get your gas unit running.

Before You Touch Anything: Read the Label and Find the Right Valve
Rheem Professional models are workhorses, but they come in a few different configurations. The most common is the standing pilot model with a gas control valve that has three clearly marked positions: Off, Pilot, and On. Some newer models use a Honeywell or White-Rodgers electronic control with a spark igniter and a small push-button. You need to know which one you have before you start.
Look at the front of the gas valve. If you see a large red or black knob with the words Off, Pilot, and On, you have a standing pilot. If you see a small black button labeled SPARK or a piezoelectric igniter, you have a newer model. The steps below cover the standing pilot first, because that’s still the most common in homes.
Before doing anything else, smell around the unit. If you detect the rotten-egg odor of natural gas, stop. Do not light anything. Open a window, leave the house, and call your gas company or a plumber from a neighbor’s phone. A gas leak is not a DIY project. If the area smells clean, proceed.
Step-by-Step: Lighting the Standing Pilot on a Rheem Professional
Here’s the process that works on most Rheem Professional and Rheem Fury models with a standing pilot. Work slowly and don’t rush the gas purge step.
- Turn the gas valve to Off. Push the knob down slightly and turn it all the way to Off. Wait five full minutes. This lets any lingering gas in the burner chamber dissipate. Do not skip this. If you try to light it immediately, you can get a small flash of flame that singes your eyebrows.
- Locate the pilot assembly. Look through the small access window at the bottom of the tank. You’ll see a small copper tube ending in a tiny nozzle. That’s the pilot. There’s also a thermocouple—a thin copper wire with a silver tip that sits right next to the pilot flame.
- Turn the knob to Pilot. Push the knob down and hold it in that position. This opens the gas flow to the pilot.
- Press the igniter button. While holding the gas knob down, press the red or black igniter button repeatedly until you see a small blue flame at the pilot nozzle. It usually takes one or two clicks. If you don’t have a spark igniter, use a long-reach lighter or a barbecue lighter to light the pilot directly.
- Hold the knob down for 60 seconds. This is the part people skip. You’re not just lighting the flame; you’re heating up the thermocouple. The thermocouple generates a tiny electrical current that holds the gas valve open. If you release the knob too early, the safety valve closes and the pilot goes out. Count a full minute, not a quick ten seconds.
- Release the knob. If the pilot stays lit, great. If it goes out, you likely have a dirty thermocouple or a weak one. We’ll cover that in a moment.
- Turn the knob to On. The main burner should ignite shortly after. You’ll hear a soft whoosh. Check the access window to confirm the burner flame is blue with a small yellow tip. A mostly yellow flame means poor combustion, which is a separate problem.
That’s it. If you’ve done this and the pilot lights but won’t stay lit, you’re not doing anything wrong. The hardware has a problem.
Why the Pilot Won’t Stay Lit: The Real Culprits
A pilot that lights and then dies within a few seconds is almost always a thermocouple issue. The thermocouple is a safety device. It senses the pilot flame and sends a small millivolt signal to the gas valve, keeping it open. If the thermocouple is dirty, worn out, or not positioned correctly in the flame, it won’t generate enough voltage, and the valve shuts off.
Here’s how to test and fix it:
- Clean the thermocouple tip. Turn everything off, wait five minutes, and gently sand the silver tip with fine grit sandpaper or a scouring pad. That removes oxidation. Re-light the pilot and see if it holds.
- Check the position. The thermocouple tip should sit right in the pilot flame, not off to the side. If it’s bent away, gently adjust it so the flame engulfs the tip.
- Replace the thermocouple. If cleaning doesn’t work, you can buy a universal thermocouple for about $10 at a hardware store. It’s a simple swap: unscrew the old one from the gas valve, pull out the old copper tube, slide in the new one, and tighten. This is a legitimate DIY repair, but take a photo before you disconnect anything so you remember the routing.
Another possible cause is a faulty gas control valve. If the thermocouple is new and clean, and the pilot still won’t stay lit, the valve itself may not be holding the safety circuit. That’s a $150 to $300 part, and replacing it involves draining the tank and dealing with gas fittings. I’d call a plumber at that point. It’s not that you can’t do it, but the risk-to-reward ratio is poor if you’re not experienced.
Newer Rheem Models: Electronic Ignition and the Reset Sequence
Rheem Professional models made in the last several years often use an electronic ignition system. There’s no standing pilot flame burning 24/7. Instead, the unit sparks to light the burner only when hot water is needed. This saves energy and is generally more reliable, but it has a different failure mode.
If you have a status light on the control panel, you’ll see a blinking sequence when something’s wrong. A single flash per second usually means normal operation. A rapid flash or a solid red light means the system has locked out. The fix is often a simple reset:
- Turn the gas valve to Off.
- Wait 30 seconds.
- Turn it back to On.
If the unit still won’t fire, check the igniter assembly. On these models, the igniter is a small ceramic probe with a wire that runs to the gas valve. Over time, the spark gap can corrode or the wire can short out. You can visually inspect the gap—it should be about 1/8 inch from the burner. If you see carbon buildup, clean it lightly. If the wire insulation is cracked, replace the igniter assembly. That’s a more involved job, but still manageable for a handy homeowner.
One thing I’ll say about electronic ignition: it’s more finicky about gas pressure. If you have a low-pressure line or a undersized regulator, these units will lock out more often than a standing pilot model. If you’re suddenly getting lockouts after years of trouble-free operation, call your gas utility to check the supply pressure before you start replacing parts.
Comparing Your Options: Repair, Relight, or Replace
Sometimes the pilot won’t light because the tank is 15 years old and rusted from the inside. You can relight it, but you’re patching a sinking ship. Here’s a practical framework for deciding what to do.
| Situation | Likely Fix | DIY Difficulty | Cost Range |
|---|---|---|---|
| Pilot goes out occasionally, relights easily | Relight, check for drafts near the unit | Easy | $0 |
| Pilot lights but won’t stay lit | Clean or replace thermocouple | Moderate | $10–$20 |
| Pilot lights, but burner flame is yellow | Clean burner ports, check venting | Moderate to Hard | $50–$150 if parts needed |
| No spark, no pilot, valve won’t respond | Replace gas control valve or igniter | Hard, often requires pro | $150–$400 |
| Tank is over 12 years old, leaks, or rusts | Replace the water heater | Pro recommended | $800–$2,500 installed |
That last row matters more than people think. A leaking tank will ruin your floor, your drywall, and your weekend. If you see water pooling under the unit, don’t bother relighting it. Start shopping.
If you do decide to replace, the Rheem 18kW 240V Tankless Electric Water Heater is worth a look. It’s a completely different approach—no gas line, no pilot, no venting. It heats water on demand with two copper immersion elements and a self-modulating control that adjusts power to match your hot water flow. The digital display gives you a precise temperature readout, and the bottom 3/4-inch NPT connections make it a straightforward swap for a tank unit. Just check your electrical panel first; an 18kW unit needs a dedicated 240V circuit with proper amperage. It’s not a plug-and-play appliance.
Five Questions People Actually Ask About Rheem Gas Water Heaters
How long should I hold the pilot button down?
Sixty seconds is the standard for Rheem standing pilot models. Some thermocouples will hold after 30 seconds, but why risk it? Hold it for a full minute. If the pilot goes out after you release the knob, you have a thermocouple problem, not a patience problem.
Why does my pilot light go out after a few days?
Intermittent pilot outage is usually a draft issue. Check the area around the water heater for open windows, exhaust fans, or a leaky attic hatch that pulls air past the pilot. If the pilot is positioned near the bottom of the tank, even a small draft can blow it out. A simple draft shield or closing a nearby window often solves it. If it keeps happening, the thermocouple may be marginal—it works when cold, but loses its output as it heats up. Replacing it is cheap insurance.
Can I relight the pilot with a regular lighter?
Yes, if you have a standing pilot model. Use a long-reach butane lighter or a fireplace lighter. Don’t use a match—you’ll burn your fingers reaching into the access panel. And never use a lighter on an electronic ignition model; those use a spark igniter and don’t need a flame source.
What does the red light on my Rheem control panel mean?
On electronic ignition models, a solid red light or a rapid blinking pattern means the system has locked out. The first thing to do is turn the valve to Off, wait 30 seconds, and turn it back to On. If the light comes back immediately, you have a sensor fault or an ignition failure. Check the igniter wire for damage, and make sure the burner access door is properly sealed. If the light persists after a reset, call a pro.
Is it safe to relight the pilot myself?
It’s safe if you follow the gas valve’s instructions and don’t smell gas. The two big rules: wait five minutes after turning the valve to Off before attempting a relight, and never use an open flame if you smell gas. Standing pilot models are designed for homeowner relighting. If you’re uncomfortable, or if the unit is older and the valve feels stiff or corroded, call a plumber. A $150 service call beats a house fire.
What to Do Next: Practical Steps for a Reliable Hot Water Supply
Relighting the pilot is a temporary fix. If you want to avoid this ritual every few months, take a few preventative steps.
- Keep the area around the water heater clear. Cardboard boxes, cleaning supplies, and clutter restrict airflow and can cause pilot outages.
- Check the temperature setting. Rheem recommends 120°F for most households. Higher settings waste energy and speed up tank corrosion.
- Drain a quart of water from the tank every three months. This removes sediment that builds up on the bottom and insulates the burner, causing overheating and premature failure.
- Inspect the vent pipe annually. A blocked vent can cause the pilot to go out repeatedly and, worse, can send carbon monoxide into your home.
- Replace the anode rod every five years. This is the sacrificial metal that prevents tank rust. If you’ve never done it, your tank is likely already corroding. It’s a messy job, but it extends tank life by years.
- Know the age of your unit. If it’s over 10 years old and you’re having recurring issues, start budgeting for a replacement. The efficiency gains alone will pay for part of the new unit.
- Consider going tankless. If you’re replacing anyway, look at electric tankless models like the Rheem 18kW. No pilot, no gas, no venting, and endless hot water. Just confirm your electrical service can handle the load.
Relighting a pilot is one of those small skills that makes you feel like a competent adult. But it’s also a reminder that water heaters are mechanical devices with finite lifespans. Treat yours well, and it’ll treat you well. When it finally gives up, you’ll know exactly what to do next.


