Building a sauna is a lot like baking bread. You can have the best oven and the finest ingredients, but if the walls leak heat and moisture, the whole thing turns out wrong. The sauna won’t hit temperature, the cedar gets soggy, and you’ve burned through electricity for nothing.
The insulation you choose for sauna walls isn’t just about R-value. It’s about managing moisture, reflecting radiant heat back into the room, and keeping the dew point where it won’t rot your framing. Get it wrong and you’ll be tearing out the wood liner in two years. Get it right and the room heats up in 20 minutes and stays dry.
This guide covers the five best insulation options for sauna walls, from heavy-duty foil barriers to reinforced radiant rolls. I’ll also give you a heater-and-size decision tree, real installed costs, and a troubleshooting chart for when things go sideways. If you’re still deciding on the sauna itself, the best affordable sauna for home guide can help you pair the right unit with the right wall assembly.
Here’s a quick comparison of the key specs, then we’ll dig into each product.
| Features | ZXQDRE 250 sqft | Sauna Place Type C | ZXQDRE 500 sqft | MWS 500 sqft | Joyfolk 250 sqft |
|---|---|---|---|---|---|
| Material & Build | Reinforced aluminum foil | Single-sided aluminum foil | Reinforced aluminum foil | Aluminum foil barrier | 8 mil reinforced aluminum |
| Coverage | 250 sq ft | 269 sq ft | 500 sq ft | 500 sq ft | 250 sq ft |
| Radiant Heat Block | Up to 96% | Not specified | Up to 96% | Not specified | 97% |
| Moisture Barrier | Non-perforated solid | Non-perforated solid | Non-perforated solid | Waterproof | Double-sided solid |
| Best Use Case | DIY 6×8 sauna | Standard 6x8x7 sauna | Large or outdoor sauna | Large DIY projects | Small sauna with tape |
ZXQDRE Sauna Foil Vapor B…
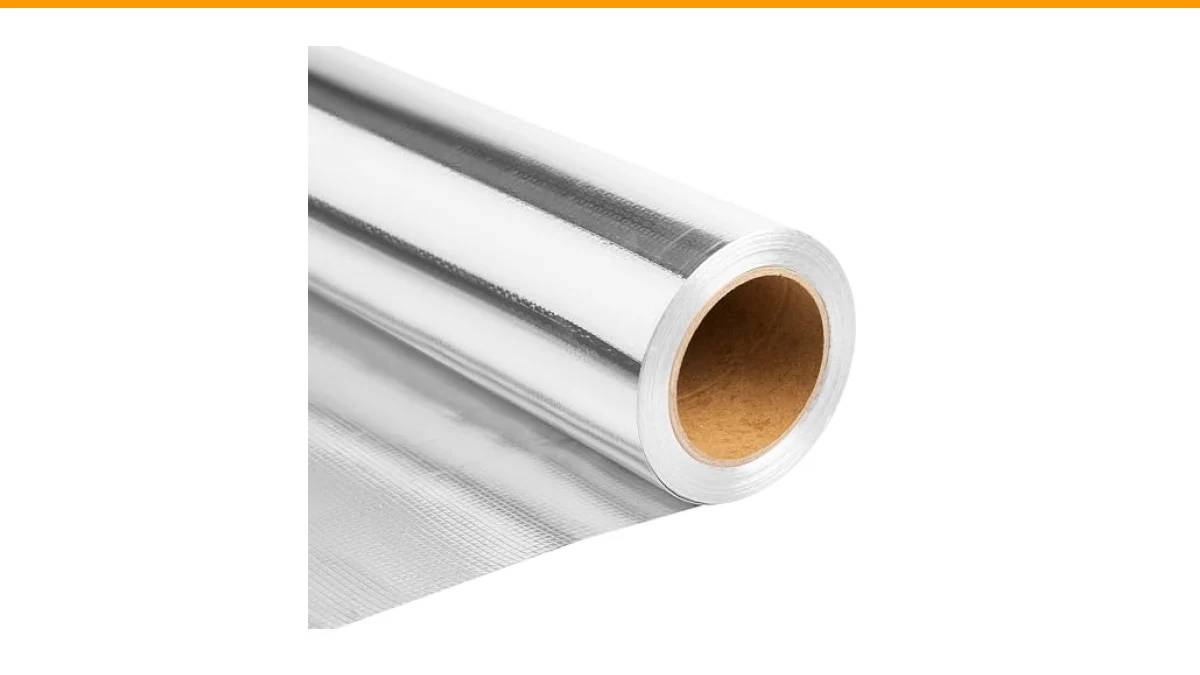
The ZXQDRE 250 sq ft roll is the Goldilocks pick for a typical backyard sauna. It covers a 6×8 room with enough overlap for seams and corners. The reinforced aluminum foil reflects up to 96% of radiant heat, which means your heater works less and the room holds temperature between sessions. It’s a solid choice for anyone building a small electric-heated sauna who wants a vapor barrier that won’t tear during installation.
What sets this roll apart is the balance of strength and workability. It cuts with scissors but resists tearing when you pull it tight over studs. The non-perforated surface creates a true moisture shield, so steam won’t migrate into the wall cavity and condense inside your framing. I’ve seen cheaper foils rip at the staple line and leave gaps you have to patch later. This one holds up.
The trade-off is that you’ll need to buy foil tape separately for the seams. The roll doesn’t come with any, and unsealed seams defeat the purpose of a vapor barrier. Also, the 250 sq ft size is tight if you have a cathedral ceiling or lots of window cutouts. Measure twice before ordering.
- Reinforced foil resists tearing at staples
- Reflects up to 96% of radiant heat
- Non-perforated solid moisture barrier
- Cuts easily with scissors for custom fits
- No tape included, so budget for that
Best for: DIY builders finishing a small to mid-size electric sauna who want a durable foil barrier without paying for extra coverage they won’t use.
The Sauna Place Type C Al…

The Sauna Place
The Sauna Place Type C Aluminum Foil Single Sided Vapor Barrier Sauna Accessories (269 Square feet) Sauna Cover up to a 6' x 8' x 7' Sauna
- PREMIUM, RADIANT, VAPOR BARRIER: Elevate your sauna construction with our superior barrier. It enhances insulation, increases R-va…
- EFFECTIVE MOISTURE PROTECTION: Protect your sauna from moisture damage. Our barrier acts as a shield, ensuring your sauna's durabi…
- EASY INSTALLATION: Simple installation process: staple to studs after framing and insulating sauna walls. Minimize cuts and overla…
The Sauna Place Type C is the specialist’s choice. It’s a single-sided aluminum foil vapor barrier sized at 269 sq ft, which is exactly enough for a 6x8x7 sauna. The brand is known for sauna-specific accessories, and this roll is designed to pair with their high-temp foil tape. If you want a barrier that’s been used in hundreds of sauna builds and comes from a company that only does saunas, this is it.
What stands out is the craftsmanship and the clear installation instructions. The roll weighs just over 6 pounds, so it’s easy to handle on a ladder. The single-sided foil radiates heat efficiently while the backing provides structural integrity. It’s not the cheapest option per square foot, but the coverage is precise and the material feels professional-grade.
Honest caveat: the single-sided design means you lose a bit of radiant reflection compared to double-sided foils. And the 269 sq ft coverage leaves almost no margin for error. If you make a wrong cut, you might run short. Order a spare roll if you’re new to this.
- 269 sq ft covers a standard 6x8x7 sauna
- Single-sided aluminum foil construction
- Weighs 6 lbs 2 oz for easy handling
- Designed to pair with high-temp foil tape
- Precise coverage leaves little waste
Best for: Sauna builders who want a purpose-made barrier from a dedicated sauna supplier and don’t mind paying a little more for exact coverage.
ZXQDRE Sauna Foil Vapor B…

ZXQDRE
ZXQDRE Sauna Foil Vapor Barrier, 4FT x 125FT 500 sqft Aluminum Insulation | Heavy-Duty Reflective Thermal Barrier Roll, Non-Perforated Aluminum Foil, Energy Saver for Sauna, Attic, Garage, Crawl Space
- Ultimate Sauna Performance: Our premium radiant barrier foil reflects up to 96% of radiant heat, ensuring your sauna or steam room…
- Complete Moisture Barrier: Engineered as a sauna vapor barrier foil, our solid, non-perforated layer creates a shield against stea…
- DIY-Friendly: Our strong yet easy-to-handle foil insulation roll makes installation simple. It cuts easily with scissors but resis…
The 500 sq ft version of the ZXQDRE foil is the same reinforced material as the 250 sq ft roll, just double the coverage. It’s aimed at larger saunas, outdoor builds, or anyone insulating a ceiling and walls in one go. If you’re building a 8×10 sauna or a barrel sauna with a lot of surface area, this roll saves you from buying two smaller ones and dealing with a mid-project seam.
The performance specs match the smaller roll: up to 96% radiant heat reflection, non-perforated moisture barrier, and a reinforced build that resists tearing. The extra length means fewer seams overall, which is a real advantage. Every seam is a potential leak point, so minimizing them improves the wall assembly’s long-term reliability.
The downside is handling. A 500 sq ft roll is heavier and bulkier. You’ll want a second person to help unroll it and keep it flat against the studs. Also, if you only need 250 sq ft, you’re paying for material you’ll store in the garage for years. Buy the size that matches your build.
- 500 sq ft covers large saunas and ceilings
- Same reinforced foil as smaller version
- Fewer seams means fewer leak points
- Non-toxic, fiber-free, no off-gassing
- Bulky to handle alone
Best for: Owners of large outdoor saunas or DIYers insulating walls and ceiling who want one continuous roll and fewer seams.
MWS 500 sqft Aluminum Foi…
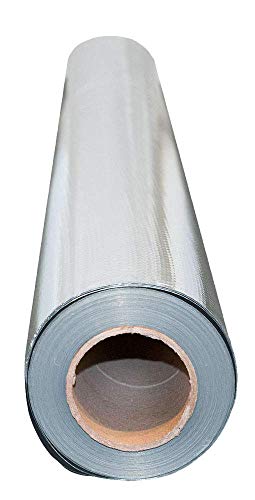
The MWS 500 sq ft roll is the budget-friendly workhorse. It’s a straightforward aluminum foil barrier insulation designed for sauna vapor protection. The product data is sparse, which tells you something: this is a no-frills option for people who know what they need and don’t want to pay for branding. It covers 500 sq ft and is waterproof, making it suitable for sauna walls and ceilings.
What I like is the coverage-to-cost ratio. For a large DIY project, this roll gets you enough material to wrap a generous sauna without breaking the bank. The foil reflects radiant heat and blocks moisture, which are the two non-negotiables for sauna insulation. If you’re on a tight budget and comfortable sourcing your own foil tape, this is a practical pick.
The honest trade-off: there’s no listed radiant heat percentage, no reinforcement details, and no tape included. You’re buying on faith a bit. The material may be thinner than the ZXQDRE or Joyfolk options, so handle it carefully during installation. It’s not the roll I’d choose for a first-time build where mistakes are likely.
- 500 sq ft coverage at a budget price point
- Waterproof aluminum foil barrier
- No listed radiant heat percentage
- No tape or reinforcement details provided
- Best for experienced DIYers
Best for: Budget-conscious builders with some sauna experience who just need coverage and will source their own tape and sealants.
Joyfolk 250 Sqft Sauna Al…

Joyfolk
Joyfolk 250 Sqft Sauna Aluminum Foil Barrier, 8 Mil Reinforced Radiant | Non Perforated Solid Design, 4ft X 62.5ft Roll Size, Reflective Vapor Shield for Sauna Walls, Heat Insulation Accessory
- Impeccable Size: our aluminum foil barrier roll comes in a satisfying size of about 250 sqft (4ft x 62.5ft), with double sided sol…
- One Package, Endless Possibilities: the package includes 1 roll sauna non perforated vapor barrier about 4ft x 62.5ft, equipped wi…
- Practical Functionality: immerse yourself in an efficient sauna experience with our sauna aluminum vapor barrier that effectively…
The Joyfolk 250 sq ft roll is the convenience pick. It’s a double-sided, 8 mil reinforced aluminum foil barrier that blocks 97% of radiant heat, and it comes with a roll of tape in the package. For a small sauna build, that tape inclusion saves you a trip to the hardware store and ensures you’re using a compatible adhesive. The double-sided foil means radiant reflection works from both faces, which can help in tight wall assemblies.
The 8 mil thickness is the standout spec. That’s thicker than typical foil barriers, which translates to better durability and less risk of punctures during installation. The 99.9% pure aluminum construction is lightweight but firm, so it stays flat against studs without sagging. For a small sauna where you want a complete kit in one box, this is a smart buy.
Availability is the main issue. This product is listed as scarce, so it may go out of stock. Also, the 250 sq ft coverage is identical to the ZXQDRE small roll, but the Joyfolk costs more because of the tape and thicker material. If you’re on a tight budget, the tape inclusion may not justify the premium.
- 8 mil reinforced aluminum for durability
- Double-sided foil blocks 97% radiant heat
- Includes a roll of tape for seams
- Lightweight but firm, resists sagging
- Stock can be limited
Best for: Small sauna builders who want a complete kit with tape included and don’t want to hunt down compatible accessories.
Why Sauna Insulation Is a Different Animal
A sauna wall assembly has to do three things at once. It has to slow conductive heat loss through the stud cavity, reflect radiant heat back into the room, and stop moisture vapor from migrating into the framing where it can condense and rot the wood. Standard basement insulation does one or two of these. Sauna insulation has to do all three, and it has to do them at temperatures that push 190°F near the ceiling.
That’s why you can’t just stuff fiberglass batts between the studs and call it done. Fiberglass works for conductive heat, but it doesn’t stop radiant heat and it doesn’t block vapor. You need a foil-facing or a separate foil vapor barrier on the warm side of the insulation. The foil does double duty: it reflects radiant heat and it acts as the vapor retarder.
Another difference is the dew point. In a sauna, the inside is hot and humid. The outside is cold. The dew point, the temperature where moisture turns to liquid, can land right in the middle of your wall cavity if the insulation isn’t thick enough or the vapor barrier isn’t sealed. When that happens, you get wet insulation, mold, and eventually structural damage. The goal is to keep the dew point inside the sauna, not inside the wall.
Best Insulation Materials Ranked for Sauna Walls
Not all insulation belongs in a sauna. Some materials handle the heat and moisture well. Others fail, off-gas, or create fire risks. Here’s how the common options stack up.
Mineral Wool (Rockwool) — The Winner
Mineral wool, often called rockwool, is the gold standard for sauna walls. It’s made from spun molten rock, so it’s naturally fire-resistant and handles high temperatures without melting or degrading. It doesn’t absorb moisture the way fiberglass does, and it won’t support mold growth. The fibers are denser than fiberglass, which gives it a better R-value per inch, usually around R-3.3 to R-4.3 depending on density.
For a sauna, mineral wool goes in the stud cavity first. Then you add the foil vapor barrier on the warm side. The mineral wool handles conductive heat loss. The foil handles radiant heat and moisture. Together they create a wall assembly that performs in the sauna’s extreme conditions.
Cost is the main drawback. Mineral wool runs higher per square foot than fiberglass, and it’s heavier to install. But for a sauna, the fire resistance and moisture tolerance are worth the premium. You’re building a hot box. Use materials that can take the heat.
Fiberglass — When It Works
Fiberglass batts are cheaper than mineral wool and widely available. They work in a sauna if, and only if, they’re kept completely dry by a well-sealed foil vapor barrier. The problem is that fiberglass loses R-value when it gets wet, and it can harbor mold if moisture gets in. In a sauna, moisture always tries to get in.
If you use fiberglass, use foil-faced batts. The foil facing acts as the vapor barrier, which saves you a step. But you still need to seal the seams between batts with foil tape. Any gap becomes a moisture path. And you need to keep the foil facing on the warm side of the wall, facing into the sauna. If you install it backward, the vapor barrier is on the wrong side and you’ll trap moisture in the cavity.
Fiberglass is a budget option for a lightly used sauna in a dry climate. For a daily-use outdoor sauna in a wet climate, spend the extra money on mineral wool.
Rigid Foam — Risks and Limits
Rigid foam boards, like polyiso or XPS, have high R-values per inch and don’t absorb water. They seem like a good fit for sauna walls. The catch is temperature. Most rigid foams are rated for service temperatures well below sauna conditions. Polyiso, for example, can start to degrade or off-gas at sustained temperatures above 180°F. Near the ceiling of a sauna, surface temps can exceed that.
Another issue is thermal bridging. Rigid foam installed between studs still leaves the studs themselves as a thermal bridge. Heat travels through the wood framing and out of the sauna. You’d need a continuous layer of foam on the exterior to break that bridge, which adds cost and complexity.
Rigid foam can work in a sauna if it’s installed on the cold side of the wall, behind the stud cavity, and covered with mineral wool on the warm side. But it’s not a simple drop-in replacement for batt insulation. Use it with caution and check the manufacturer’s temperature ratings.
Natural/Reflective Options
Reflective foil barriers, like the ones reviewed above, are not insulation in the traditional sense. They don’t have a high R-value on their own, usually around R-1. But they reflect radiant heat, which is the dominant form of heat transfer in a sauna. A foil barrier paired with mineral wool gives you the best of both worlds: conductive and radiant protection.
Natural options like hemp or sheep’s wool are sometimes mentioned for saunas. They handle moisture better than fiberglass and don’t off-gas. But they’re expensive, hard to source in batt form, and they still need a foil vapor barrier. For most builders, mineral wool plus foil is the practical choice.
R-Value Targets by Sauna Type and Climate
How much R-value do you actually need? It depends on where the sauna is and how you use it. Here’s a simple decision tree.
Indoor sauna, climate-controlled space: R-11 to R-13 in the walls, R-19 in the ceiling. The sauna is protected from extreme cold, so you don’t need to over-insulate. The goal is to keep heat in the room and protect the surrounding structure from moisture.
Outdoor sauna, moderate climate: R-13 to R-15 in the walls, R-19 to R-21 in the ceiling. You’re fighting outside temperatures in the 20s and 30s. More insulation means faster heat-up and less energy waste.
Outdoor sauna, cold climate: R-15 to R-21 in the walls, R-21 to R-30 in the ceiling. In places where winter temps drop below zero, you need serious insulation. The ceiling matters most because heat rises. Skimp on ceiling insulation and you’ll never get the room hot.
Barrel sauna: R-13 to R-15 in the walls, R-19 in the ceiling. Barrel saunas have curved walls, which makes installation trickier. Use mineral wool batts that can compress into the curve, then cover with a flexible foil barrier.
These are minimums, not maximums. More insulation doesn’t hurt, but it costs more and takes up more space. In a small sauna, thicker walls mean less interior room. Balance performance with usable space.
The Vapor Barrier Rule: Foil, Seams, and Penetrations
The foil vapor barrier is the most important part of the sauna wall assembly. It keeps moisture out of the insulation and framing. But it only works if it’s continuous and sealed. A single unsealed seam or penetration can let enough moisture through to cause problems.
Use foil tape with a high-temp adhesive for all seams. Standard duct tape will fail at sauna temperatures. The adhesive will dry out and the tape will peel. High-temp foil tape is designed for this. Overlap your foil runs by at least two inches, then tape the seam. Press the tape firmly with a roller or squeegee to ensure good adhesion.
Penetrations are the tricky part. Heater wires, light fixtures, vents, and the sauna heater itself all need to pass through the vapor barrier. Each penetration is a potential leak. Seal them with high-temp silicone or foil tape, depending on the size. For heater wires, use a high-temp grommet or silicone caulk around the wire where it passes through the foil. For vents, use a foil-faced damper or seal the gap with foil tape.
Don’t forget the corners and the ceiling-to-wall junction. These are common leak points. Run the foil continuously from wall to ceiling if possible, or overlap and tape the joint. The goal is a sealed envelope with no gaps.
Correct Wall Assembly Order (Step-by-Step)
Getting the order right prevents moisture problems and ensures the insulation performs as designed. Here’s the sequence from the outside in.
- Exterior sheathing and weather barrier: If the sauna is outdoors, start with the exterior siding and a weather-resistant barrier. This keeps rain out.
- Stud cavity: Frame the walls with 2×4 or 2×6 studs, depending on your R-value target. 2×4 gives you about 3.5 inches of insulation depth. 2×6 gives you 5.5 inches.
- Mineral wool insulation: Fill the stud cavity with mineral wool batts. Cut them slightly wider than the cavity so they stay in place. Don’t compress them, as that reduces R-value.
- Foil vapor barrier: Staple the foil to the studs on the warm side, facing into the sauna. Overlap seams by two inches and tape them with high-temp foil tape.
- Furring strips: Install vertical furring strips over the foil. These create an air gap between the foil and the wood liner, which improves radiant heat reflection and gives you a nailing surface.
- Wood liner: Install cedar or thermory wood liner over the furring strips. Use stainless steel or coated fasteners to avoid corrosion from the cedar’s natural acids.
The air gap between the foil and the wood liner is important. It lets the foil reflect radiant heat back into the room instead of conducting it into the wood. It also allows any moisture that gets past the liner to drain or evaporate instead of sitting against the foil.
Matching Insulation to Your Heater and Sauna Size
Your heater type and sauna size determine how much insulation you need and where to focus your budget.
Electric heater, small sauna (4×6 to 6×8): R-13 in the walls, R-19 in the ceiling. Electric heaters have precise temperature control, so they can compensate for lower insulation. But better insulation means faster heat-up and lower energy bills. Use mineral wool plus a 250 sq ft foil roll.
Electric heater, large sauna (8×10 or bigger): R-15 in the walls, R-21 in the ceiling. Larger rooms lose more heat through the walls. Upgrading to R-15 reduces the heater’s workload. Use mineral wool plus a 500 sq ft foil roll.
Wood-fired heater, any size: R-15 to R-21 in the walls, R-21 to R-30 in the ceiling. Wood-fired heaters produce intense radiant heat and can overshoot temperatures if the room is under-insulated. Better insulation gives you more control and prevents the sauna from getting too hot. Use mineral wool plus a heavy-duty foil barrier.
Infrared sauna: R-11 to R-13 in the walls, R-19 in the ceiling. Infrared saunas operate at lower temperatures, so they need less insulation. But they still need a vapor barrier if you use water or steam. A standard foil barrier works fine.
If you’re still choosing a sauna, the best outdoor red light sauna for home guide covers options that pair well with these insulation strategies.
Outdoor, Barrel, and Pre-Built Sauna Considerations
Outdoor saunas face temperature swings that indoor saunas don’t. In winter, the outside of the wall can be below freezing while the inside is 180°F. That extreme difference pushes the dew point toward the cold side of the wall. You need enough insulation to keep the dew point inside the sauna, not in the wall cavity.
Barrel saunas are a special case. The curved walls make it hard to fit standard batts. You’ll need to compress mineral wool into the curve or use a flexible insulation. The foil barrier also has to bend around the curve without tearing. Look for a foil with some flexibility, like the reinforced rolls reviewed above. The 8 mil Joyfolk foil is a good candidate for barrel saunas because it’s thicker and less likely to puncture.
Pre-built saunas often come with insulation already installed. Check what’s there before you add more. Some manufacturers use fiberglass with a foil facing. If the foil is intact and sealed, you may not need to upgrade. If it’s thin or poorly sealed, adding a second foil layer over the existing one can improve performance. Just make sure you don’t create a double vapor barrier, which can trap moisture between the layers.
Real Costs and Installation Checklist
Insulation costs vary by material and region, but here are realistic installed costs per square foot for sauna walls.
- Mineral wool batts: $1.50 to $2.50 per sq ft installed. Higher in cold climates where thicker batts are needed.
- Fiberglass batts: $0.75 to $1.50 per sq ft installed. Cheaper, but lower performance in wet conditions.
- Rigid foam boards: $2.00 to $3.50 per sq ft installed. High R-value, but temperature limits apply.
- Foil vapor barrier: $0.30 to $0.60 per sq ft for material. Installation is DIY-friendly.
- Foil tape: $15 to $25 per roll. You’ll need one to two rolls for a standard sauna.
For a 6×8 sauna with 7-foot ceilings, you’re looking at roughly 250 sq ft of wall and ceiling surface. Mineral wool plus foil barrier runs about $450 to $700 in materials. Fiberglass would be $250 to $400. The difference is small compared to the total cost of the sauna, and mineral wool lasts longer and performs better.
Installation checklist:
- Measure wall and ceiling area, add 15% for waste and overlap
- Buy mineral wool batts sized for your stud spacing (16 or 24 inches on center)
- Buy foil barrier with enough coverage for walls and ceiling
- Buy high-temp foil tape for seams
- Buy high-temp silicone for penetrations
- Install batts without compressing them
- Staple foil to studs, overlapping seams by two inches
- Tape all seams with foil tape
- Seal all penetrations with silicone or grommets
- Install furring strips for the air gap
- Install wood liner with stainless or coated fasteners
- Check for gaps or tears before finishing
Common Mistakes and Troubleshooting
Even experienced builders make mistakes with sauna insulation. Here are the most common ones and how to fix them.
Sauna won’t reach temperature. This is usually an insulation problem. Check for gaps in the vapor barrier, missing insulation in the ceiling, or compressed batts. The ceiling is the biggest culprit. Heat rises, and if the ceiling is under-insulated, the sauna will struggle. Add more insulation in the ceiling and seal any gaps.
Hot and cold spots. Uneven temperatures mean uneven insulation. Check for voids in the stud cavity where batts don’t fill the space. Also check for thermal bridging through the studs. If the studs are exposed to the cold, they’ll conduct heat out of the room. Adding a continuous layer of insulation or using furring strips can help.
Moisture on the foil. If you see condensation on the foil barrier, the dew point is landing on the wrong side. This usually means the vapor barrier is on the cold side of the insulation, or the insulation isn’t thick enough. The foil should be on the warm side, facing into the sauna. If it’s on the cold side, you’ve installed it backward. You’ll need to remove the wood liner and reinstall the foil correctly.
Cedar liner corrosion. Cedar contains natural acids that can corrode metal fasteners and, in some cases, interact with aluminum foil. Use stainless steel or coated fasteners for the wood liner. If the foil is in direct contact with cedar, consider a thin air gap or a protective layer to prevent corrosion.
Off-gassing odors. Some insulation materials off-gas at high temperatures. Fiberglass and rigid foam are the main offenders. Mineral wool and aluminum foil don’t off-gas. If you smell plastic or chemical odors in your sauna, the insulation is likely the source. Replace it with mineral wool and foil.
How We Chose These Products
We evaluated each foil vapor barrier on five criteria: radiant heat reflection, moisture barrier integrity, durability, ease of installation, and coverage value. Products with reinforced construction and clear performance specs ranked higher. We also considered whether the roll included tape or required separate purchases.
We prioritized products with non-perforated surfaces, because a perforated foil defeats the purpose of a vapor barrier. We also looked for materials that are non-toxic and fiber-free, since saunas are enclosed spaces where off-gassing is a real concern. Coverage was weighed against typical sauna sizes to identify which rolls offer the best fit for common builds.
Buying Guide: What Really Matters
The single most important spec is the moisture barrier. It must be non-perforated and solid. If the foil has holes, steam will pass through and condense in the wall cavity. Check the product description for the word ‘non-perforated’ or ‘solid.’ If it’s not there, assume it’s perforated.
Radiant heat reflection matters, but only if the foil is installed with an air gap. The foil reflects heat back into the room when there’s a space between the foil and the wood liner. If the wood liner is pressed directly against the foil, the reflection is less effective. Plan for furring strips.
Durability is the third factor. Thicker foil resists tearing during installation. Reinforced foil holds staples better. If you’re building a barrel sauna or a sauna with complex angles, spend the extra money on a thicker foil. It’ll save you from patching tears later.
Finally, consider the tape. Some rolls include tape. Some don’t. High-temp foil tape is not optional. You need it to seal seams. If the roll doesn’t include tape, add it to your cart. The cost is small compared to the risk of a leaky vapor barrier.
Our Top Recommendation
The ZXQDRE 250 sq ft Sauna Foil Vapor Barrier is our top pick for most sauna builds. It offers the best balance of performance, durability, and coverage for a typical 6×8 sauna. The reinforced foil resists tearing, the non-perforated surface blocks moisture, and the 96% radiant heat reflection keeps the room hot. It’s not the cheapest option, but it’s the one we’d trust in our own sauna.
For larger saunas or outdoor builds, the ZXQDRE 500 sq ft roll is the better choice. Same material, double the coverage, fewer seams. For budget-conscious builders, the MWS 500 sq ft roll gets the job done at a lower price, though you’ll need to source your own tape and handle it carefully.
If you want a complete kit with tape included, the Joyfolk 250 sq ft roll is a solid alternative. And if you prefer a purpose-made sauna product from a dedicated supplier, The Sauna Place Type C is worth the premium. Pair any of these with mineral wool batts, and you’ll have a wall assembly that performs for years.
For more sauna building tips, including how to choose the right cedar for your liner, see the best cedar wood for sauna aroma guide.
Frequently Asked Questions
Can I use regular fiberglass insulation in a sauna?
You can, but only with a foil-faced vapor barrier and only if you keep it completely dry. Fiberglass loses R-value when wet and can harbor mold. Mineral wool is a better choice for sauna walls because it handles moisture and high temperatures without degrading. If you already have fiberglass, make sure the foil facing is on the warm side and all seams are taped.
Do I need a vapor barrier if I use foil-faced insulation?
Foil-faced insulation has a vapor barrier built into the facing. You don’t need a separate foil layer, but you do need to seal the seams between batts with foil tape. Any gap between batts becomes a moisture path. If you use unfaced insulation, you need a separate foil vapor barrier on the warm side.
How do I seal around the sauna heater and wires?
Use high-temp silicone caulk or a high-temp grommet where wires pass through the foil. For the heater itself, follow the manufacturer’s installation instructions. Most heaters have a mounting plate that sits against the wall. Seal the gap between the plate and the foil with high-temp silicone. Don’t use standard caulk, as it will fail at sauna temperatures.
What’s the best insulation for a barrel sauna?
Mineral wool batts work well in barrel saunas because they can compress into the curve without losing too much R-value. For the foil barrier, choose a flexible reinforced foil that can bend around the curve without tearing. The Joyfolk 8 mil foil is a good option because it’s thicker and more puncture-resistant. Avoid rigid foam boards, as they won’t conform to the curve.
Do I need a building permit for sauna insulation?
Permit requirements vary by location. In most areas, insulating an existing