You come home from work, walk down to the basement, and step into an inch of cold water. The source? Your 12-year-old water heater. The bottom rusted through while you were away. Now you’re looking at a flooded floor, ruined storage boxes, and a cleanup that costs four figures.
This happens more often than most homeowners realize. A water heater doesn’t give you a lot of warning before a catastrophic failure. Sediment builds up, the tank corrodes from the inside, and one day the pressure or the rust wins. The result is a sudden leak that can damage floors, walls, and belongings before you even know it started.

Zircon
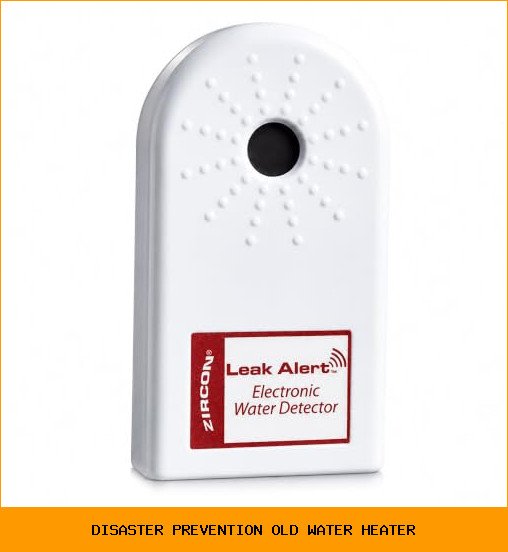
Zircon® Leak Alert™ Water Leak Detector, Loud 90 dB Water Alarm | Detect leaks before costly water damage near water heaters, appliances and plumbing fixtures; no setup required
- Early Water Leak Detection: Zircon Leak Alert water detector alarm sounds when direct water contact is detected, helping you catch…
- Loud 90 dB Alarm: Battery-powered water leak sensor sounds a 90 dB loud alarm when it gets wet, giving homeowners a fast way to be…
- Floats During Flooding: In the event of a flood, the detector is designed to float on top of the water and continue signaling for…
This article walks you through exactly what you need to do for disaster prevention old water heater scenarios. You’ll get a concrete inspection plan, a list of tools that actually help, a comparison of monitoring methods, and the three mistakes people make over and over. Read it now, and you’ll save yourself a lot of money and headache later.
A simple tool like the Zircon Leak Alert gives you an early warning system for exactly this kind of situation. You place it near the water heater base, and it sounds a 90 dB alarm the second it touches water. The detector floats during a flood and keeps signaling for up to 72 hours. For about the cost of a pizza, you get a device that can save you thousands in water damage repairs. The three-pack covers your water heater, washing machine, and dishwasher, so you’re not guessing where the next leak will come from.
Why Old Water Heaters Fail – The Numbers Tell the Story
Most tank-style water heaters last 8 to 12 years. After that, the odds of a leak go up fast. Here’s what’s happening inside the tank.
The tank is steel lined with glass. That glass coating protects the metal from water corrosion. But every time the heater cycles, the metal expands and contracts. Micro-cracks form in the glass. Rust starts eating through the steel, usually at the bottom where sediment collects.
Sediment is the second killer. Hard water deposits calcium and magnesium at the bottom of the tank. That layer insulates the water from the burner. The burner runs longer and hotter. The bottom of the tank overheats, weakens the steel, and eventually a pinhole leak appears. Once one pinhole forms, more follow fast.
The pressure is always there. A water heater operates between 50 and 80 psi normally, but it can spike higher if the temperature-pressure relief (T&P) valve fails or if the pressure tank on a well system is waterlogged. That pressure pushes on the weakest spot of the corroded tank.
One more thing: the anode rod. It’s a sacrificial metal rod inside the tank that attracts corrosion instead of the steel. But it wears out after 3 to 5 years. If you never replace it, the tank becomes the sacrificial metal. That’s when failure accelerates.
So the real risk with an old water heater is not a slow drip. It’s a sudden, large-volume leak that can dump 40 to 80 gallons of water onto your floor in minutes.
Step-by-Step Inspection – What to Check Right Now
You can do a full inspection in about 30 minutes. Grab a flashlight, a screwdriver, and a phone to take notes. Follow these steps in order.
- Find the age. Look at the serial number on the manufacturer’s sticker. Most companies encode the year and month. For example, a serial number starting with ‘F22’ might mean June 2026. Google the brand’s decoding method if you’re not sure. If the unit is over 10 years old, start planning for replacement.
- Listen for sounds. Stand near the tank when it’s heating. Do you hear rumbling, popping, or crackling? That’s sediment boiling and shifting. Heavy sediment means the bottom of the tank is already compromised.
- Look for visible rust or moisture. Check the floor around the base. Check the top where the cold water inlet and hot water outlet connect. Look for orange or brown stains on the tank jacket. Any rust on the outside means it’s likely worse on the inside.
- Test the T&P valve. Place a bucket under the discharge pipe. Lift the valve’s test lever for a couple of seconds. Hot water should rush out. If nothing comes out, or if it dribbles, the valve is stuck or failed. That’s a pressure disaster waiting to happen.
- Drain a few gallons of water. Attach a garden hose to the drain valve at the bottom. Run the hose to a floor drain or outside. Open the valve and let water flow until it runs clear. If the first water is dark, rusty, or full of grit, that’s heavy sediment. Do this every six months, not just once.
- Check the anode rod. This is the most overlooked step. The rod is usually under a hexagonal plug on top of the tank. Turn off the power or gas, disconnect the hot water pipe if needed, and unscrew the plug with a 1-1/16 inch socket. Pull the rod out. If it’s covered in calcium or the steel core is exposed, replace it.
A quick pro tip: if you can’t easily remove the anode rod because the plug is seized, be careful. Over-torquing can crack the tank. Sometimes it’s better to leave it rather than risk breaking something. Not ideal, but honest.
Your Disaster Prevention Toolkit – Tools That Actually Stop the Flood
Inspecting is good. Having the right tools and backups is better. Here’s what I recommend every homeowner keep near their water heater.
- A water leak detector. The Zircon Leak Alert fits this role perfectly – place it on the floor near the base, and it screams when water hits the contacts. It floats, so even if the water rises, it keeps alarming.
- A metal drip pan. If your water heater sits on a wood or concrete floor, put a galvanized drip pan under it. The pan should be at least 2 inches deep and slightly wider than the tank diameter. It catches small leaks and directs them away from the floor.
- A garden hose. Keep a dedicated hose attached to the drain valve. This way, you can drain the tank in a hurry without hunting for a hose in the garage. Label it so nobody uses it for other purposes.
- A water shut-off tool. Know where the cold water supply line to the water heater is. Have a valve that shuts off easily. If you have a gas water heater, also know how to close the gas valve. Practice it once.
- Pipe insulation. Insulate the first 3 feet of the hot water pipe leaving the tank. It reduces standby heat loss and keeps the pipe from sweating in humid basements, which can look like a leak.
Now, how do these compare to each other? The table below shows three common approaches to monitoring and preventing water heater floods.
| Method | What It Does | Cost Range | Best For | Limitation |
|---|---|---|---|---|
| DIY visual inspection + manual sediment drain | You look for rust, test the valve, drain sediment yearly | $0 (your time) | Homeowners who stay on top of maintenance | Only catches existing problems; no early alert |
| Professional inspection by a plumber | Annual check of tank, anode, valve, gas connections | $100–$200 per visit | People who don’t trust their own skills | Cost adds up; still not 24/7 monitoring |
| Automated leak detector + shut-off valve | Sensor triggers a 90dB alarm; some systems auto-shut the water | $30–$300 (detector + valve) | Anyone who wants real-time protection | Requires battery or power; valve installation may need a plumber |
The table shows that a leak detector gives you the best value for 24/7 coverage. Pair it with a drip pan and annual inspections, and you’ve covered most of the risk.
5 Questions People Ask About Water Heater Disaster Prevention
How often should I drain my water heater?
Every six months. Mark it on your calendar. If you have hard water (over 10 grains per gallon), do it every three months. Draining removes the sediment that accelerates corrosion. Don’t skip it because it’s a hassle – that sediment is what eats through the tank from the inside.
What does a failing anode rod look like?
Pull it out and compare it to a new one. A healthy rod is mostly intact with some pitting. If it’s down to a thin wire, or if the steel core wire is visible, it’s exhausted. If it’s covered in a thick white crust, that’s calcium buildup – the rod still works but less effectively. Replace it anytime the diameter is less than half the original.
Can a water heater burst without warning?
Yes. Catastrophic failures often happen at night or when the house is empty. The tank can rupture along a rust-weakened seam, dumping the entire contents in minutes. A slow drip is not a reliable early warning. That’s why a flood alarm is critical – it gives you the only real warning you’ll get.
Should I replace a 15-year-old water heater that still works?
Yes. Replace it preemptively. A 15-year-old tank is living on borrowed time. The probability of a leak in the next two years is high. The cost of replacement (around $500–$1,500 installed) is far less than fixing water damage to floors, drywall, and belongings. Do it before it fails.
What’s the best way to protect against flooding from a water heater?
Layer your defenses. Start with a drip pan under the heater. Add a battery-operated leak detector like the Zircon Leak Alert right next to it. Do a biannual drain and anode check. Replace the unit before it hits 12 years. And make sure everyone in the house knows where the shut-off valve is. That combination gives you the best odds of catching a problem before it becomes a catastrophe.
Three Mistakes That Will Cost You
Mistake #1: Ignoring the T&P valve. If that valve fails, pressure can build until the tank explodes. Test it once a year. If it doesn’t flow freely, replace it. It’s a cheap part (under $20) and a 15-minute job.
Mistake #2: Never changing the anode rod. Most homeowners don’t even know it exists. Without a functional anode, the tank rusts from the inside in 3–5 years. Replacing the rod every 3–5 years can double the life of a water heater. That’s the single best disaster prevention old water heater move you can make.
Mistake #3: Waiting for a visible leak. A puddle on the floor means the tank is already compromised. By then, structural damage to the floor might have started. Act on age and inspection findings, not on visible water. That’s the difference between prevention and recovery.
What to Do Right Now – The Short List
- Find your water heater’s age. If it’s over 10 years old, put a replacement on your to-do list within the next year.
- Place a Zircon Leak Alert on the floor directly under or next to the water heater. Test it once a month by touching the metal contacts with a wet finger.
- Drain a few gallons of water from the tank today. Check if the water is rusty or gritty. If it is, start draining every 3 months.
- Test the T&P valve by lifting the lever for 2 seconds. If no water comes out, replace the valve.
- Check the anode rod this weekend. If it’s worn, buy a replacement and install it. Your water heater will thank you.
- Install a metal drip pan under the tank if you don’t already have one.
- Teach everyone in your house how to shut off the water to the water heater and the main water supply.
One last thing. Disaster prevention for an old water heater isn’t a one-time project. It’s a habit. Spend 15 minutes every six months doing the inspection steps above. That small time investment beats the hell out of mopping up 50 gallons of water at 2 AM.


